Setting up single sign-on
Aevy authenticates users through your own identity provider using SAML 2.0, so your team logs in with the corporate credentials and the multi-factor rules they already have. You register Aevy as an application in your provider, map four claims, and send us your federation metadata URL. It’s a one-time setup.
Before you begin
Section titled “Before you begin”You need rights to register an enterprise application in your identity provider: in Microsoft Entra ID that’s Cloud Application Administrator or Global Administrator.
You also need your organization identifier from Aevy. It’s the short name for your company that appears in the reply URL below, and that your users type when they log in. Your Aevy contact issues it during onboarding.
Every login is service-provider-initiated: a user opens aevy.app, and Aevy redirects them to your provider. Your provider authenticates them and posts the assertion back, and Aevy signs the user in with an active session.
- You decide who gets in. Assigning a user or a group to the Aevy application in your provider grants access. Removing the assignment revokes it, without involving us.
- You keep the login rules. Multi-factor, conditional access, and password policy stay in your provider. Aevy stores no passwords for your users.
- Aevy grants what they can see. Authentication is yours. We configure roles and asset access inside the platform, on request.
Provider-initiated login isn’t supported, so an application tile in your provider’s portal should point at https://aevy.app rather than try to start the handshake.
Have two values ready to register. Both are fixed, apart from your organization identifier in the reply URL:
| Identifier (Entity ID) | https://auth.aevy.app/realms/aevy |
| Reply URL (ACS) | https://auth.aevy.app/realms/aevy/broker/{org_id}/endpoint |
Replace {org_id} with your organization identifier, and keep the path exactly as written. A trailing slash or a wrong identifier is the most common reason a login bounces back with an error.
Aevy also needs four claims in the assertion, which map your directory’s attributes onto the Aevy user. All four must be present: a user whose assertion is missing one authenticates at your provider and then fails to resolve to an account here.
| emailaddress | http://schemas.xmlsoap.org/ws/2005/05/identity/claims, from user.mail |
| givenname | http://schemas.xmlsoap.org/ws/2005/05/identity/claims, from user.givenname |
| surname | http://schemas.xmlsoap.org/ws/2005/05/identity/claims, from user.surname |
| name | http://schemas.xmlsoap.org/ws/2005/05/identity/claims, from user.userprincipalname |
Register Aevy in Microsoft Entra ID
Section titled “Register Aevy in Microsoft Entra ID”Go to portal.azure.com and search for Enterprise applications.
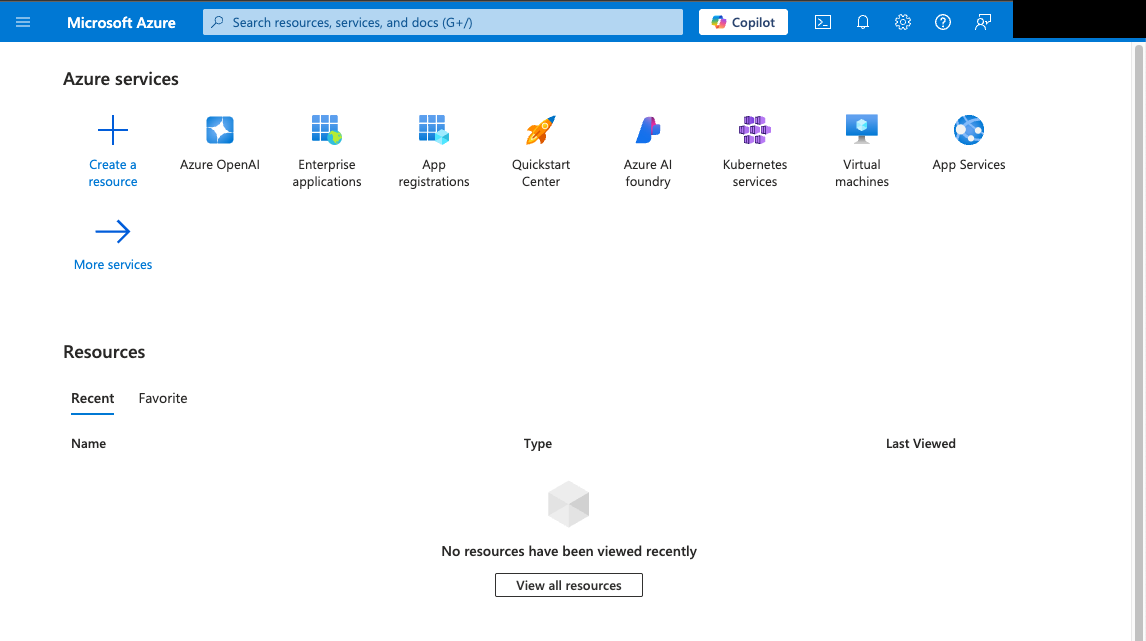
The Azure portal. Enterprise applications is in the search box and in the services row. With the list of your organization’s applications open, press New application.
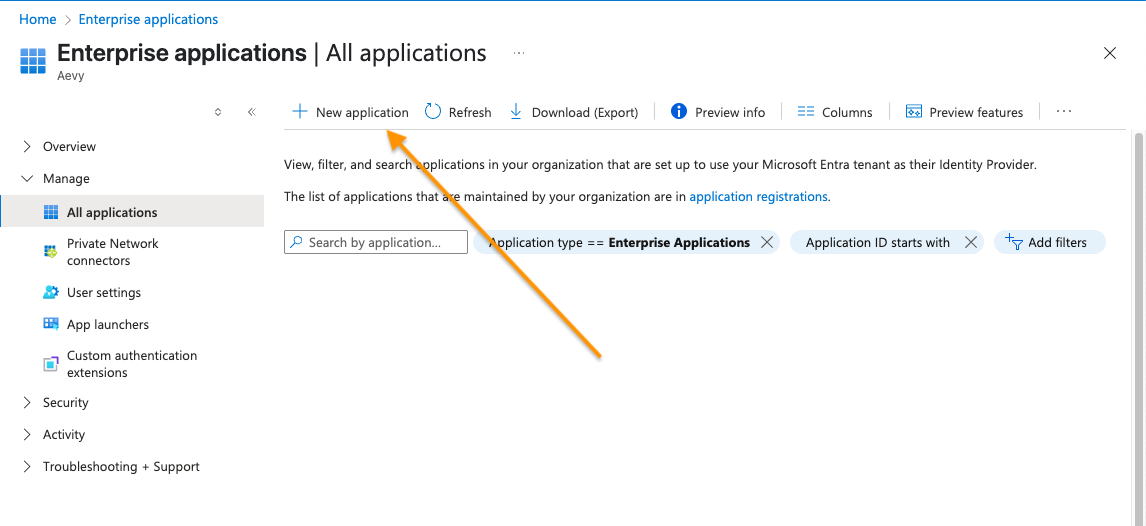
The applications already registered in your tenant, with New application at the top. Press Create your own application.
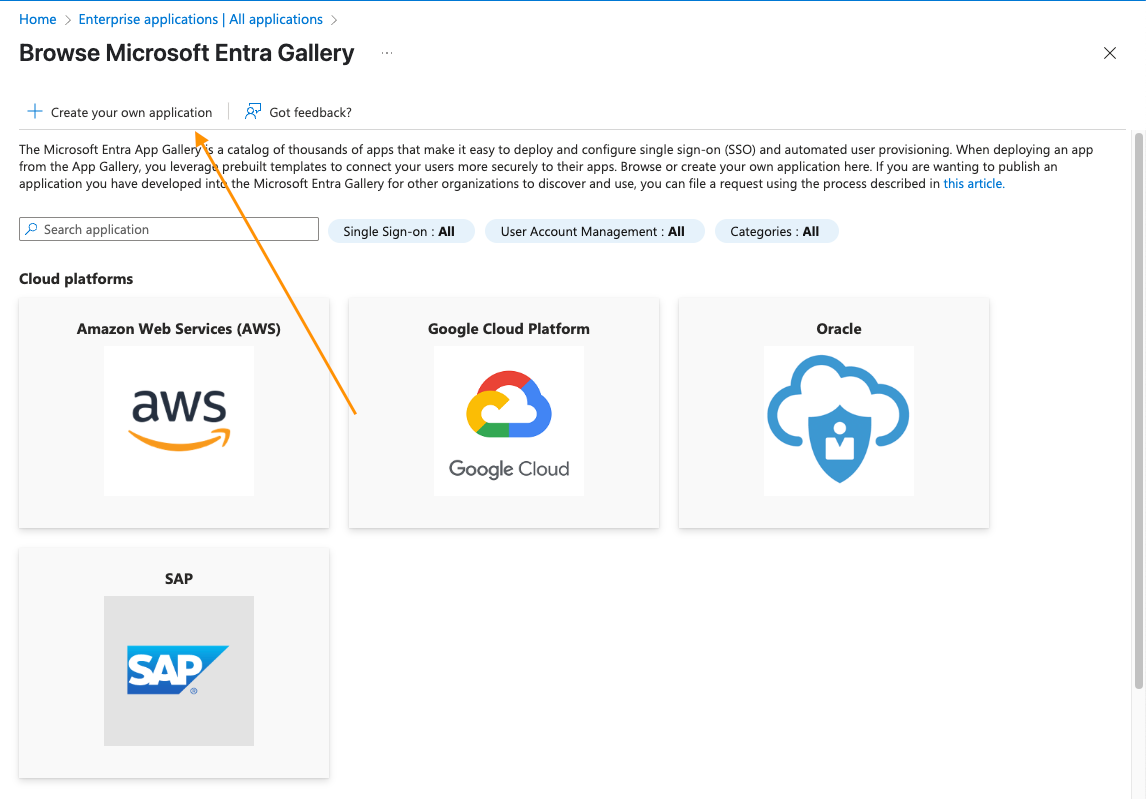
Aevy is not in the gallery, so the registration starts from Create your own application. Name it
aevy, or whatever your team recognizes, choose Integrate any other application you don’t find in the gallery, and press Create.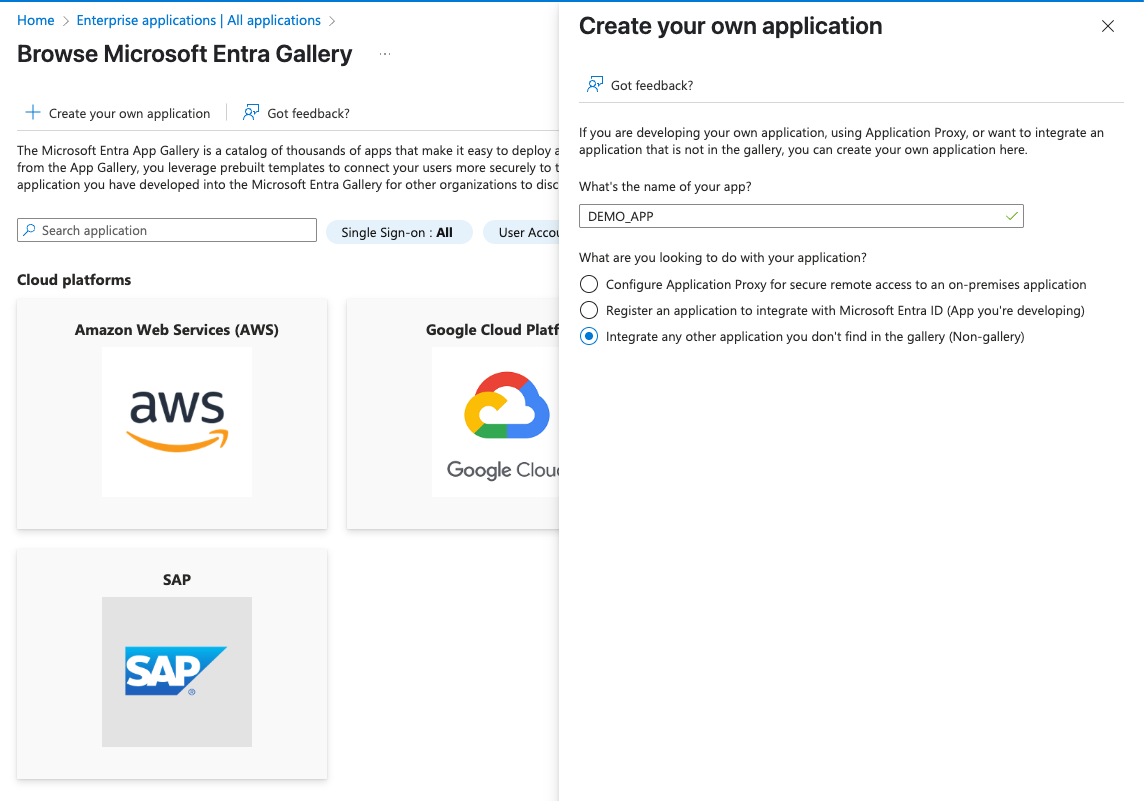
The name is yours; the third option (non-gallery) is the one that gives you SAML. On the application’s overview, select Single sign-on in the left menu.
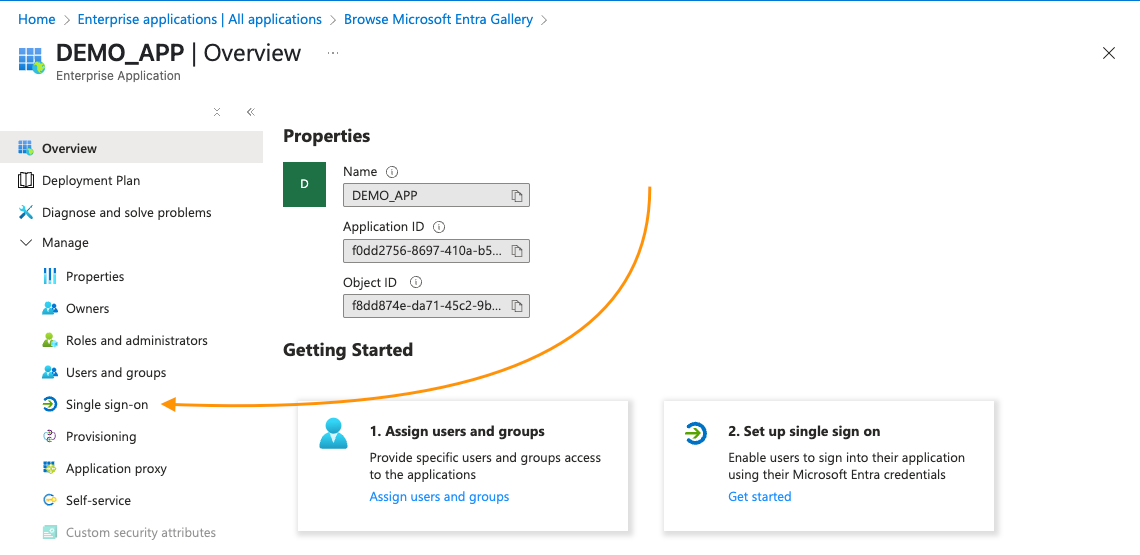
Single sign-on is under Manage in the application’s own menu. Choose SAML as the method.
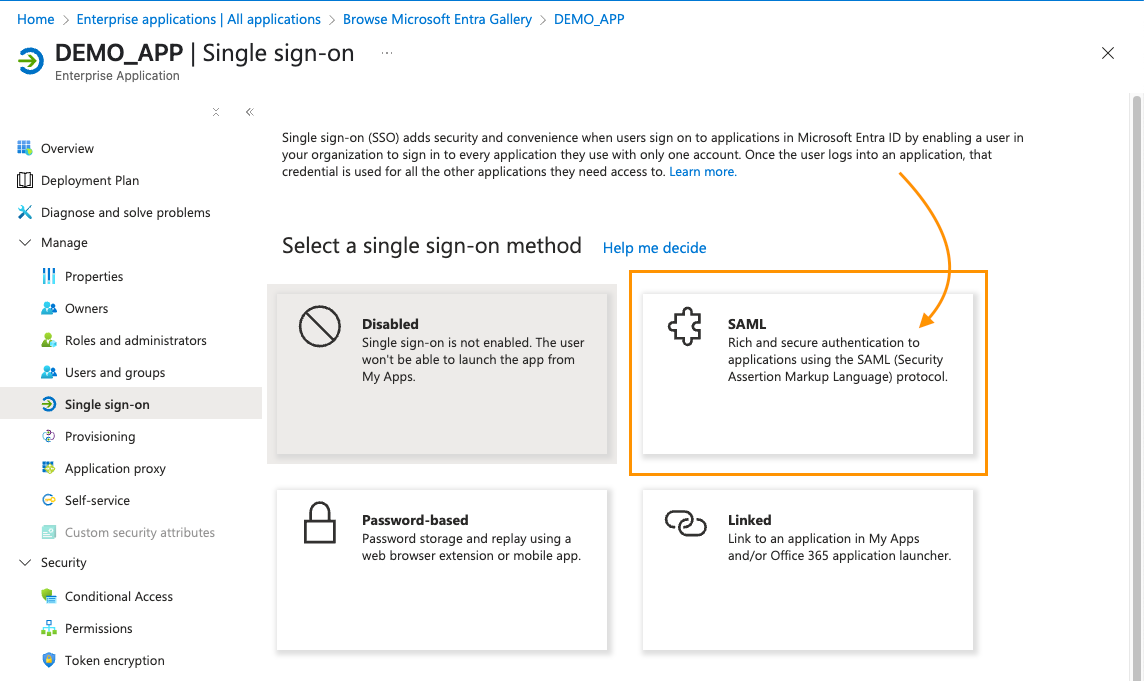
SAML, not the linked or password options. Edit Basic SAML Configuration and enter the identifier and reply URL from the table above, with your organization identifier in place of
{org_id}.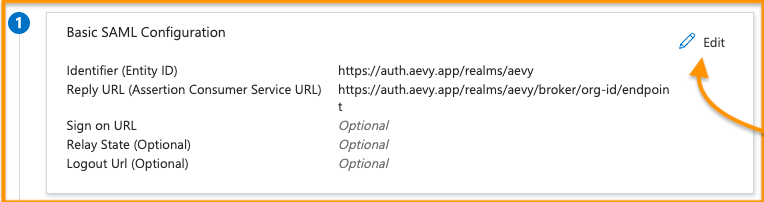
Basic SAML Configuration, filled in. Sign on URL, relay state, and logout URL stay empty. Check Attributes & Claims against the four claims above.
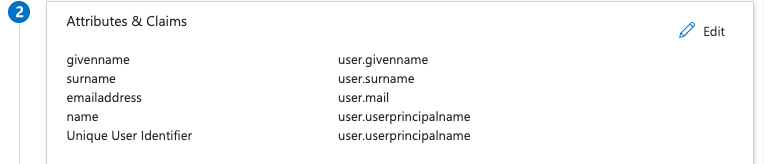
The four claims and their source attributes, as Entra shows them once mapped. Copy the App Federation Metadata Url from the SAML certificates panel and send it to your Aevy contact. We register your provider against your organization identifier from that metadata, and read the current signing certificate from it as yours rotate.
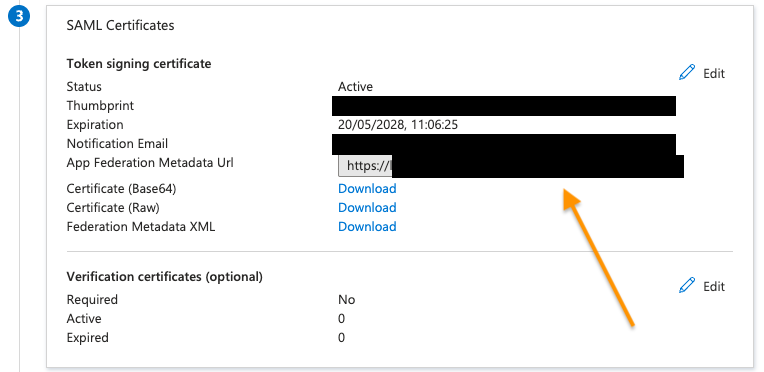
The metadata URL in section 3. Assign the users or groups who should have access, then have one of them log in at aevy.app once we confirm the registration is live.
Register Aevy in another SAML 2.0 provider
Section titled “Register Aevy in another SAML 2.0 provider”The same setup works on any SAML 2.0 provider, with the same values:
-
Create a SAML application in your provider.
-
Set the identifier and reply URL from the table above, with your organization identifier in the reply URL.
-
Map the four claims, with the namespace exactly as written.
-
Send your application’s federation metadata URL to your Aevy contact.
Verify with a test user at aevy.app.
OpenID Connect isn’t a standard integration here, but we can support it on request. Ask your Aevy contact.
Verify the login
Section titled “Verify the login”A first successful login opens on You’re all set: Aevy creates the account and configures the access for it. The screen needs nothing from the user. Once provisioning finishes, their Portfolio opens with their assets in the sidebar.
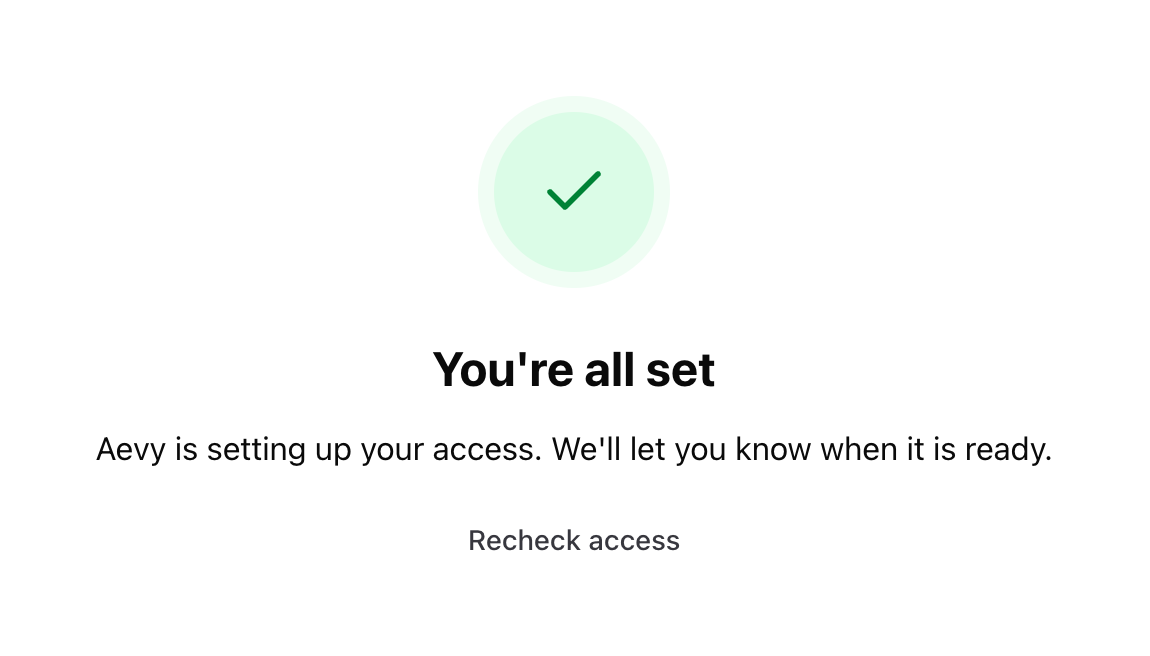
Recheck access checks again without a reload. If someone is still waiting, or reaches the platform without the assets they expect, tell your Aevy contact and we grant the missing access. Nothing in your provider needs changing for it.
Signing out of Aevy ends the Aevy session only. Your provider’s session is untouched, so your provider may not prompt a user who signs out and back in for credentials. Aevy sessions also expire on their own, which sends the user back through your login page on the next click.
Troubleshooting
Section titled “Troubleshooting”Each of these points at one place to look:
| Login returns to your provider with an error | Reply URL mismatch. Compare it character for character, including your organization identifier and any trailing slash. |
| The user authenticates, then hits “user not found” | A missing or misnamed claim. All four must be present, with the namespace exactly as written. |
| A certificate or signature error | The signing certificate rotated. Re-send the federation metadata URL to your Aevy contact. |
| Some users can log in, others can’t | The others aren’t assigned to the application. In Entra, check the app’s Users and groups, including group membership. |
| Nobody reaches Aevy at all | A tenant-side block: assignment, the application’s sign-in toggle, or a Conditional Access policy. Your sign-in log names which one. |
| The user waits on the You’re all set screen | Provisioning on our side hasn’t finished. Tell your Aevy contact. |
| A name or email is wrong or empty in Aevy | Claim mapping, usually one account rather than the mapping: user.mail is empty for some directory accounts. |
When your tenant blocks the sign-in
Section titled “When your tenant blocks the sign-in”A login can fail inside your tenant, before any request reaches Aevy. When that happens, we see nothing at all. No assertion arrives, our logs have no record to show you, and the only place the reason exists is your own sign-in log. This is the most common cause of “SSO is broken” that turns out not to be SSO. One or more of the following tenant settings may cause it:
- Assignment. With Assignment required? set to Yes on the Aevy application, only assigned users and groups can sign in. Your provider refuses everyone else. In the sign-in log this reads as
AADSTS50105. - The application’s sign-in toggle. Enabled for users to sign-in? set to No blocks the whole application for everyone, whatever the assignments say.
- Conditional Access. A policy targeting the Aevy application, or all cloud apps, applies its conditions here too. Those conditions might include a compliant device, a managed browser, a named location, or an MFA method your users don’t have enrolled. A blocked attempt reads as
AADSTS53003. Policies written for “all cloud apps” catch a newly registered application without anyone deciding to block it. That’s worth checking first when a working setup stops working. - The account itself. Disabled, or licensed in a way that excludes the app.
Where to look: in Entra ID, open Monitoring, then Sign-in logs, and filter to the Aevy application. Each failed attempt names the user, the policy that applied, and an error code.
We can tell you which users have reached us and when, which is the useful thing to compare against.
What’s next
Section titled “What’s next”- Connecting SharePoint: the other one-time administrator job, including why you grant the permission per site rather than tenant-wide.
- Information security: where Aevy hosts the data, what’s separated per organization, and what happens to it at the end of the term.